Magilight
A specialized tool for drawing with light is a relatively new product on the market - Magilight. Basically, it is a shorter, modernized version of the Pixel Stick, which has been on the market for several years. There are two versions - one one meter long with 144 LEDs and the other 30 centimeters long with 42 LEDs. However, the longer version is sold and the shorter one can be purchased.

The Magilight arrives safely packaged in a hard paper tube. Inside is bubble wrap and inside that is a carrying case and two covers over the device. Inside, apart from the Magilight, is a charger with cable, a mini manual and as a bonus a small soft box for the flash. As an additional product you can also get a remote launcher for all possible camera brands. The Magilight has a built-in wireless communicator. Once it lights up, it can send a signal to trigger the shutter. Unfortunately at this point (08/18) they still haven't worked out all the kinks, hence this launcher doesn't work on my E-M1 mark II, which is a shame.

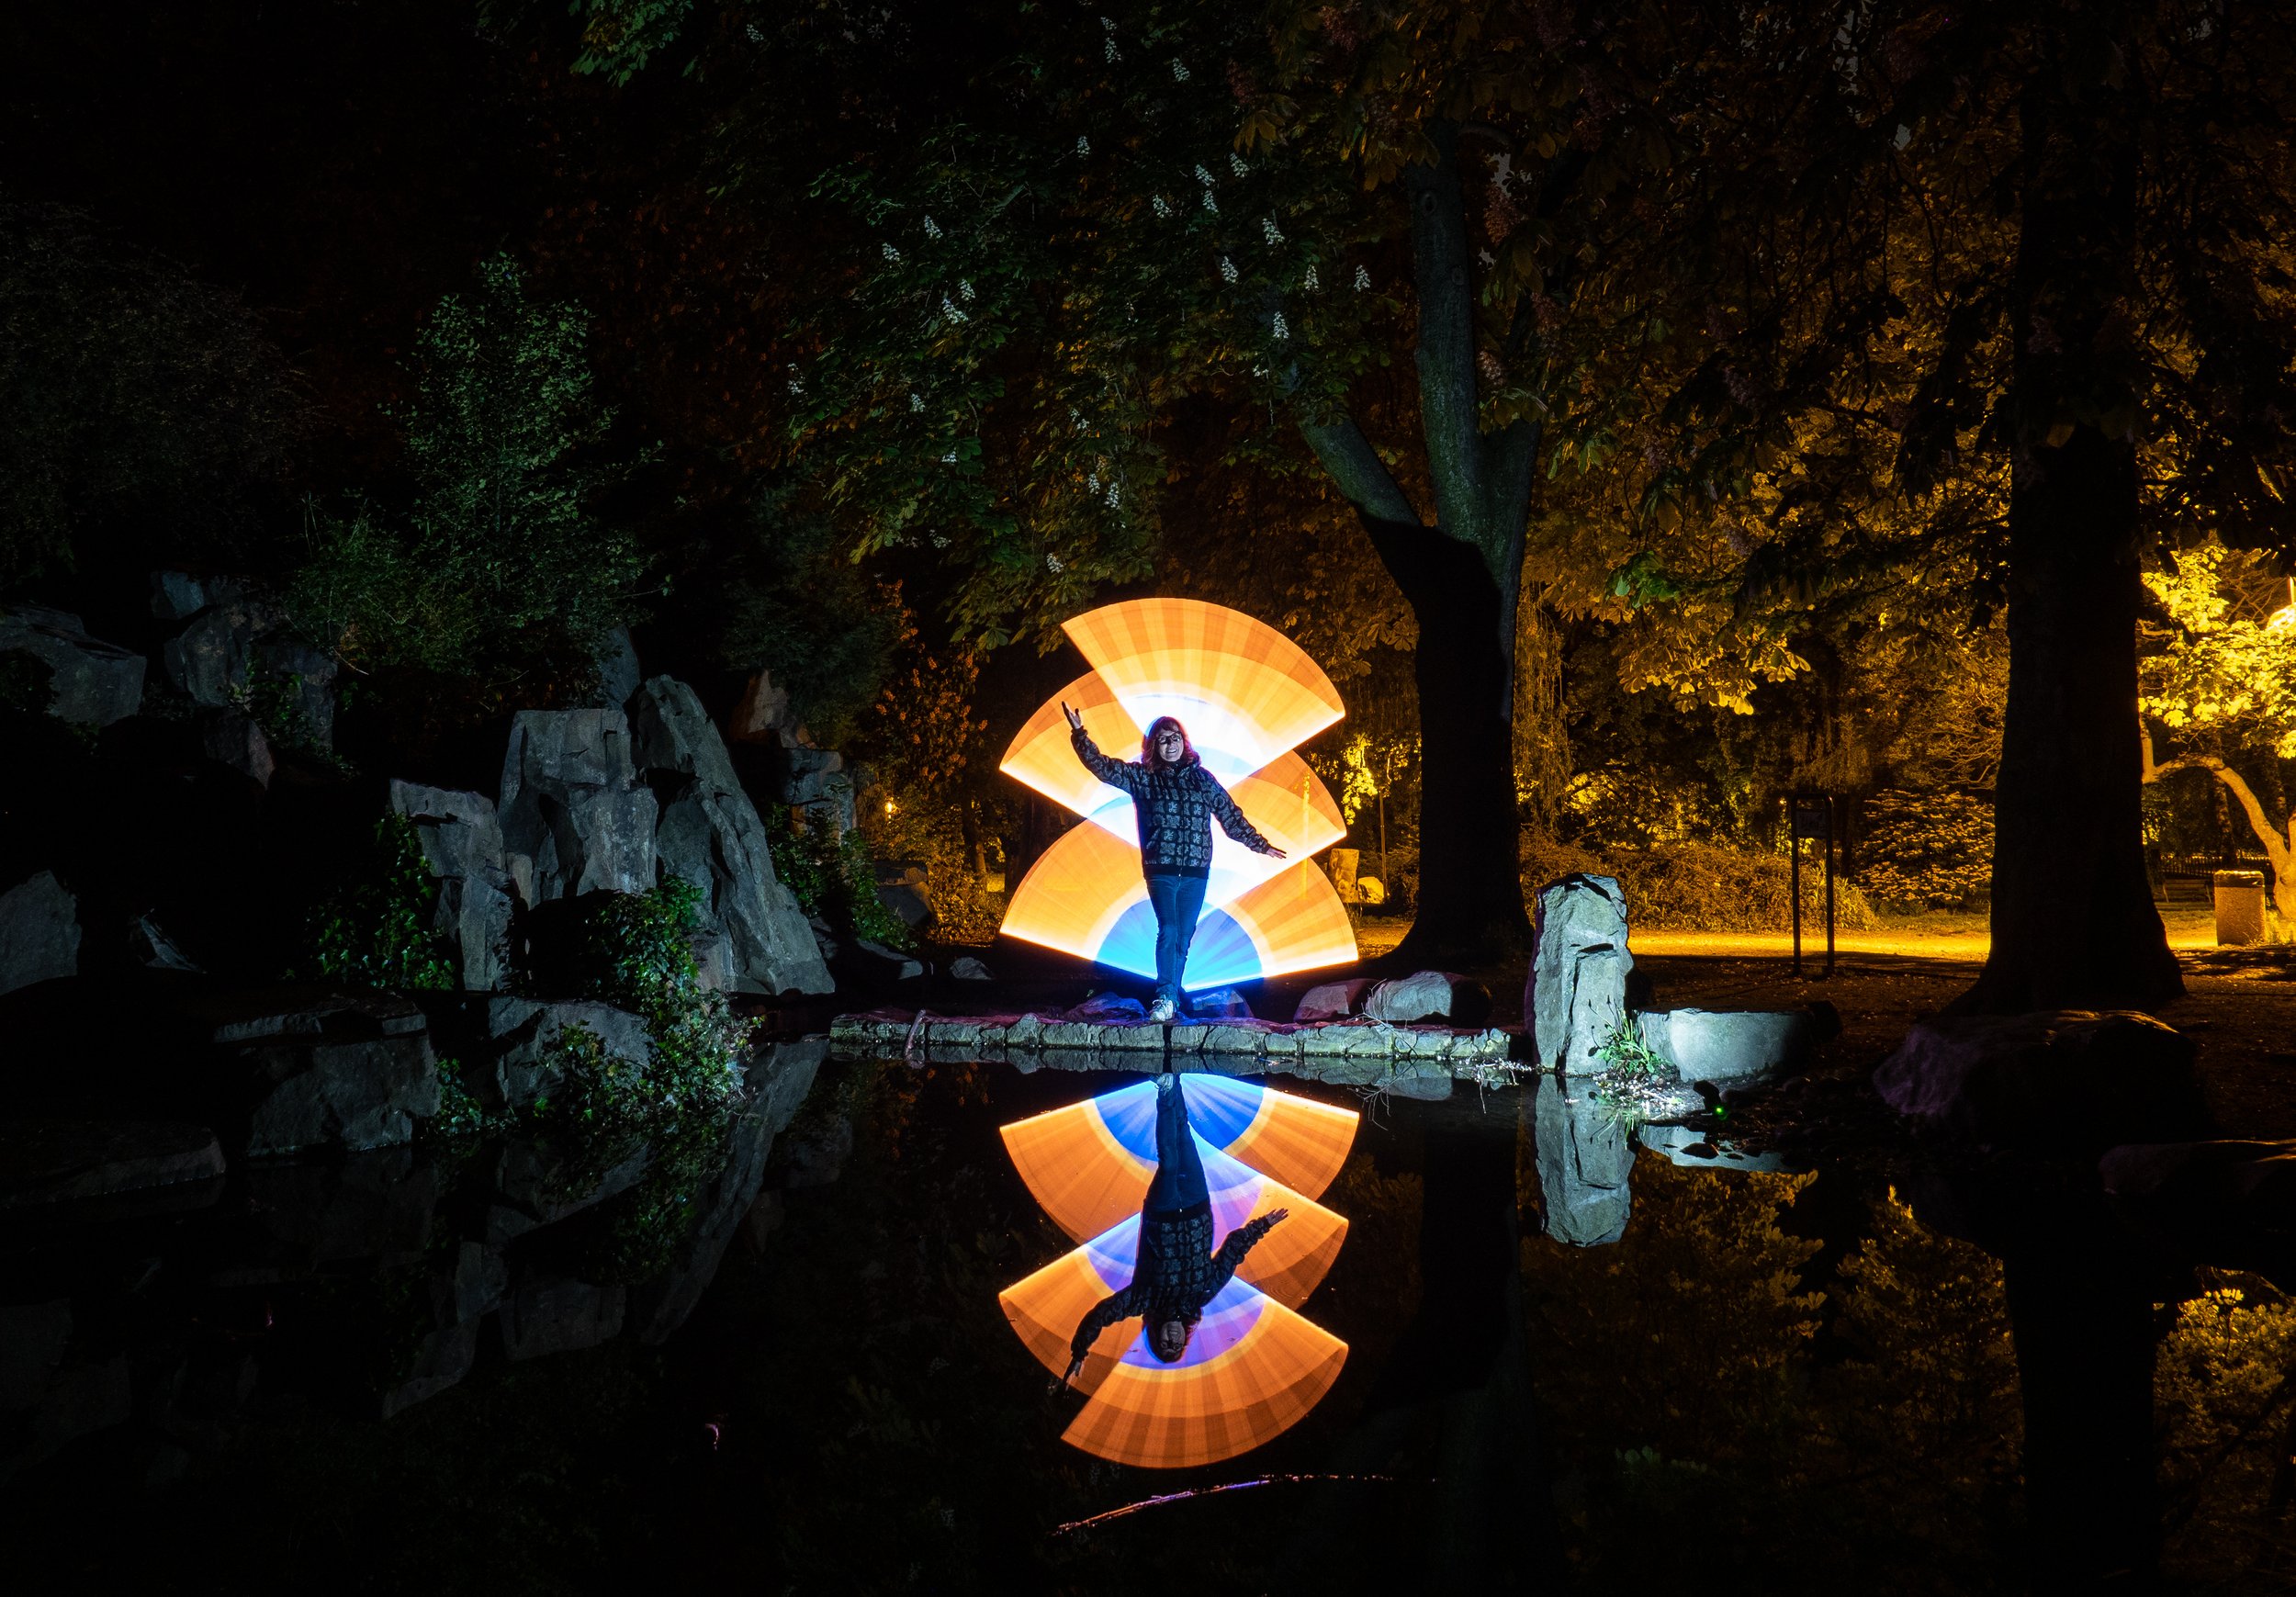
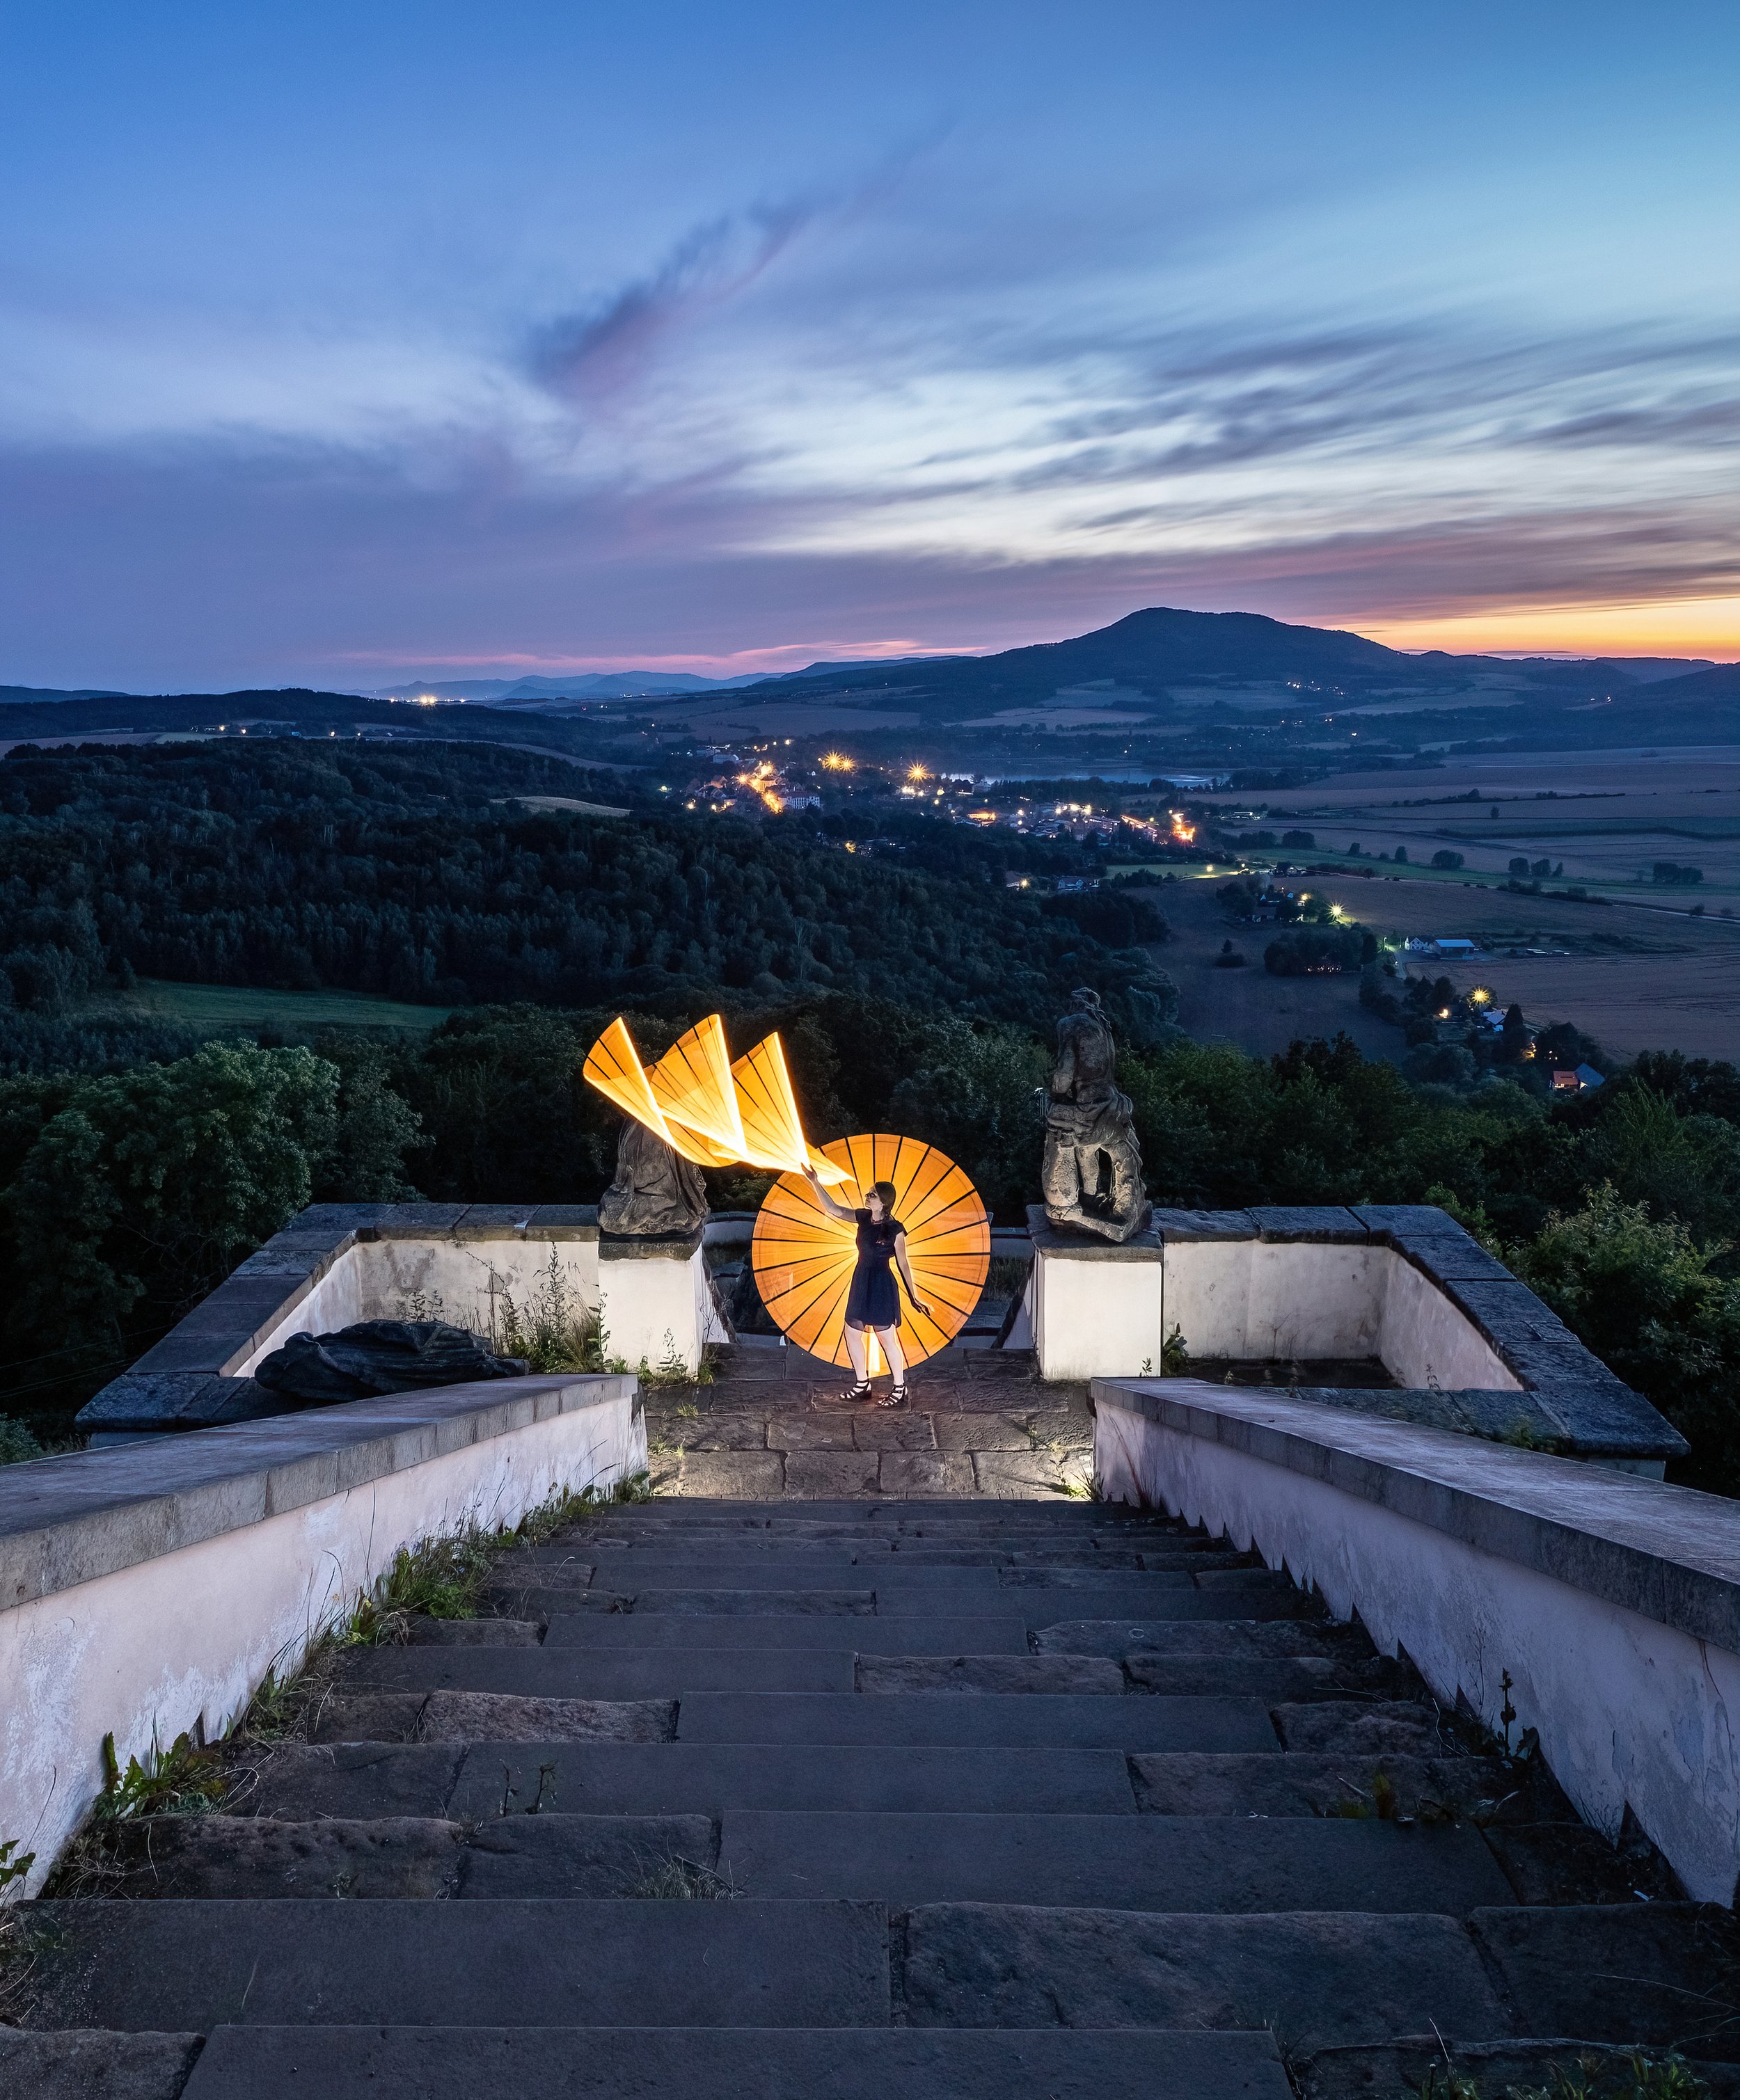
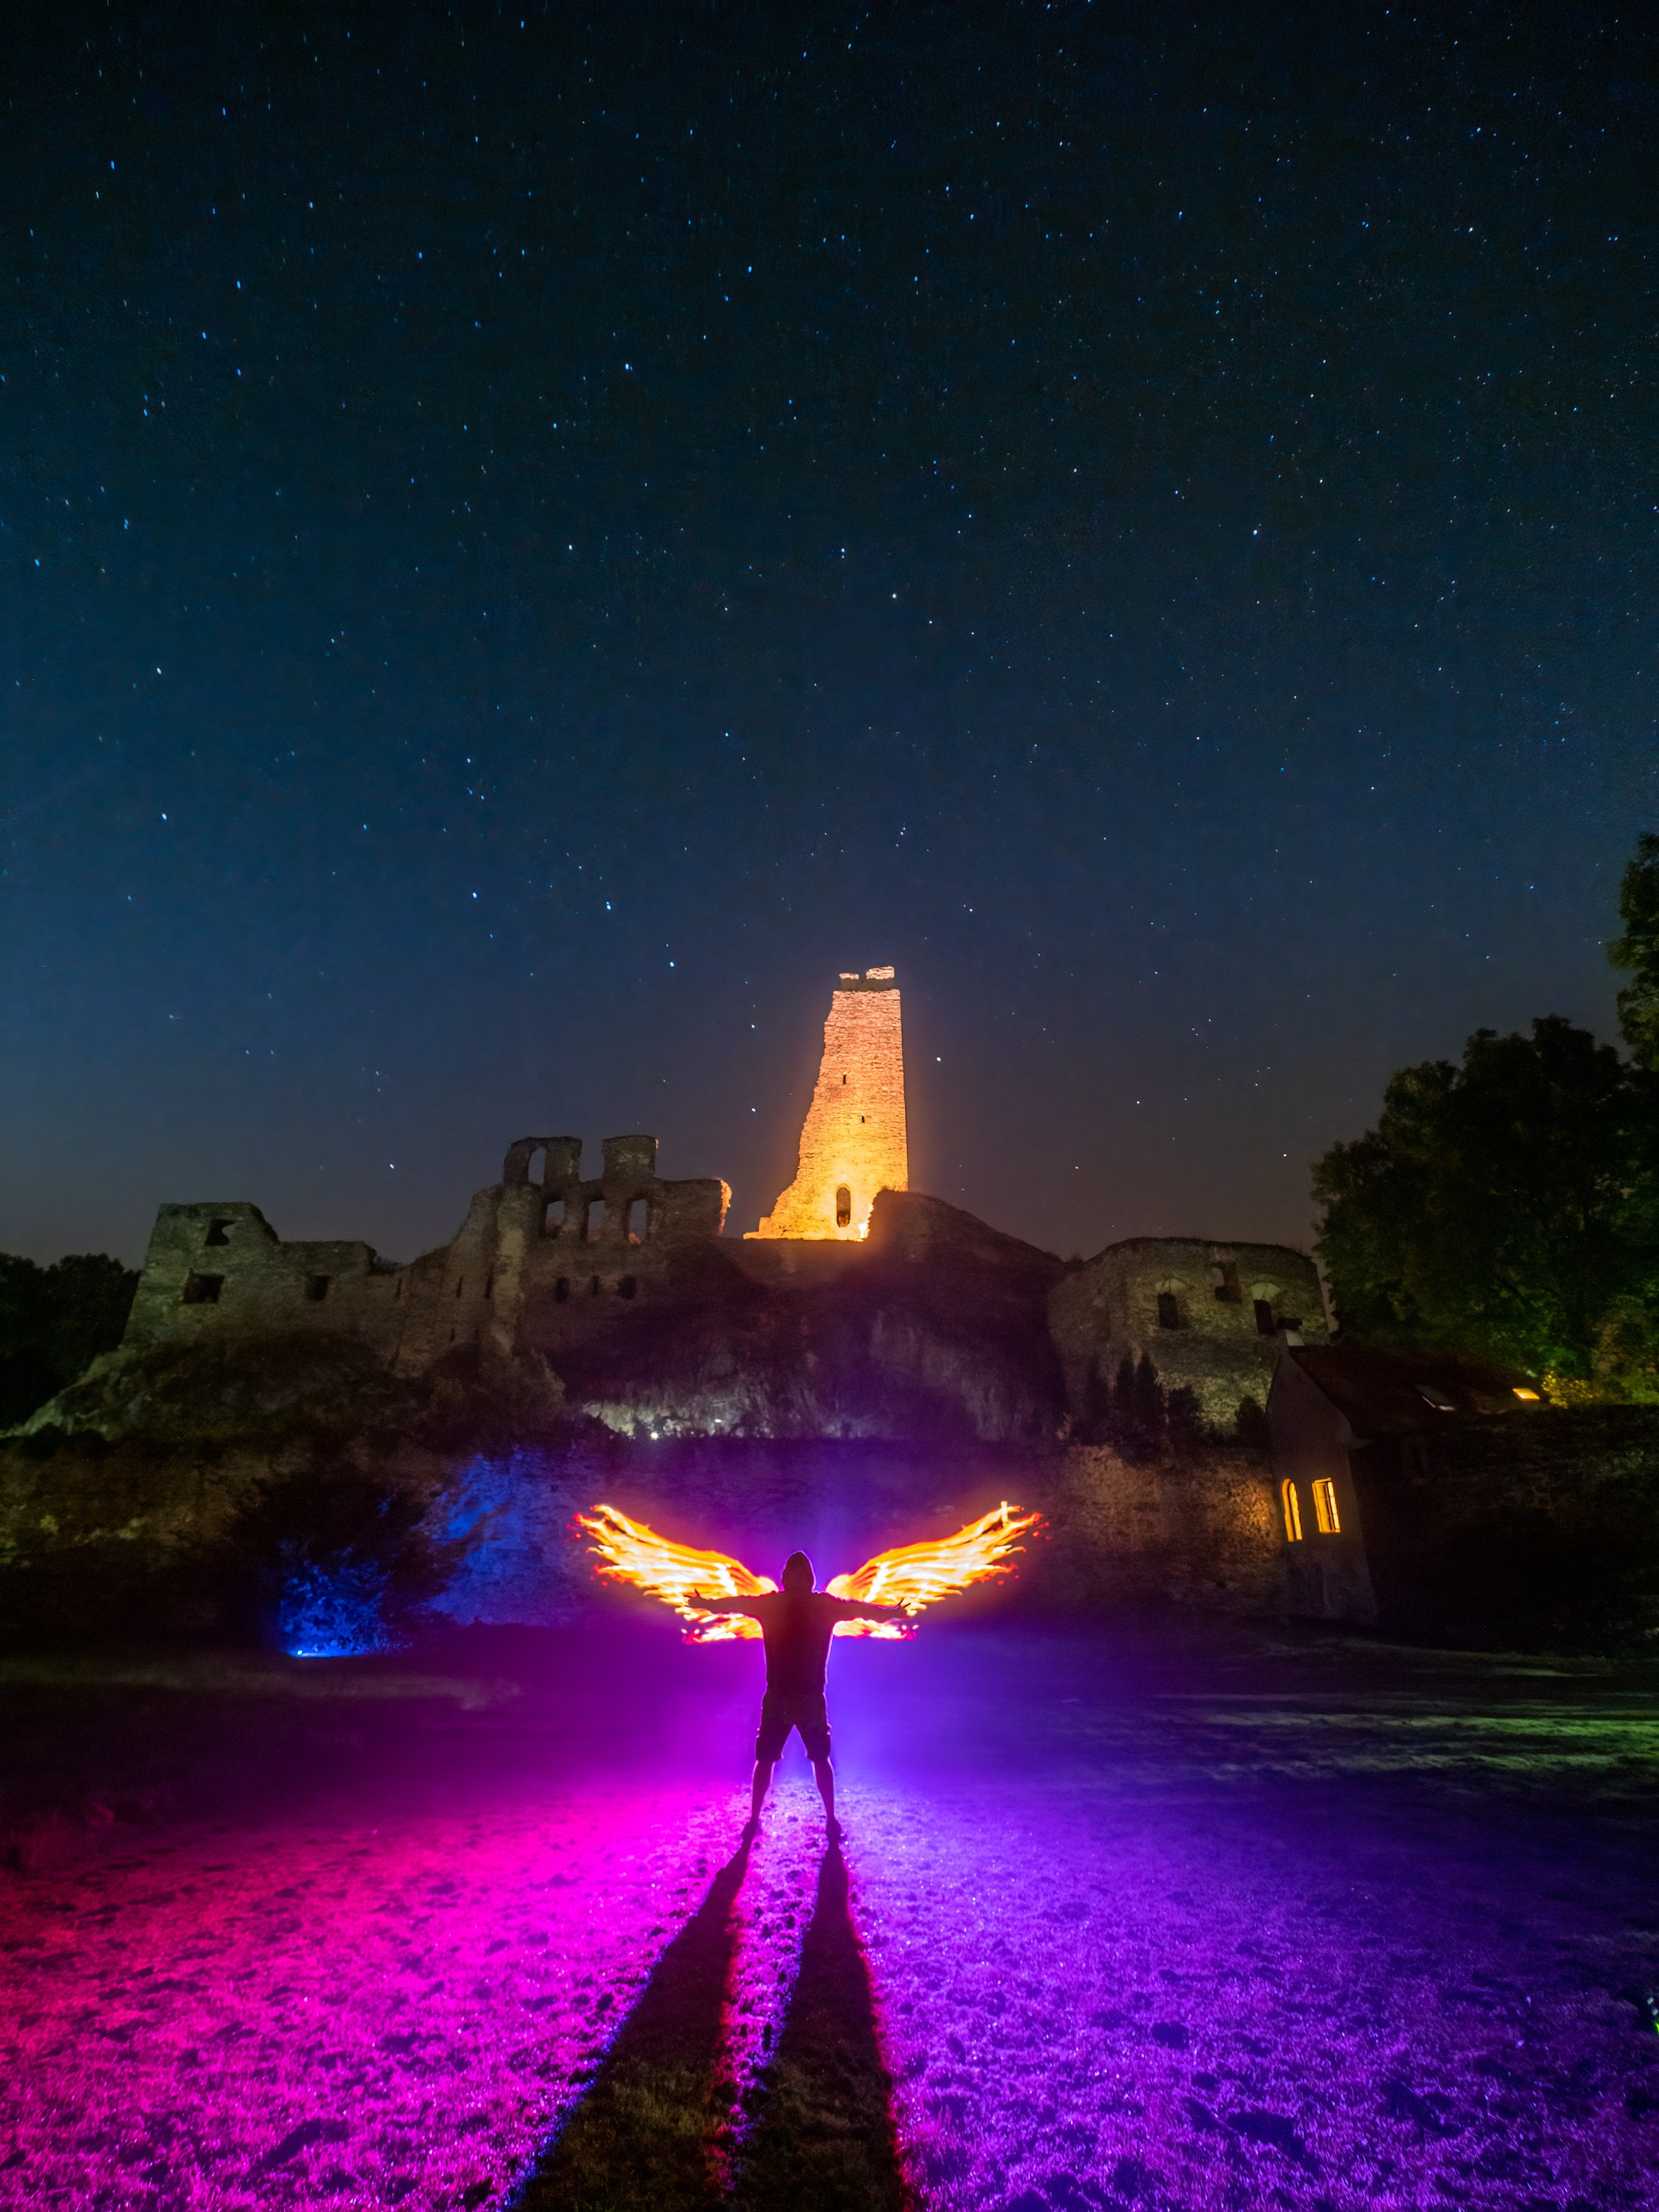
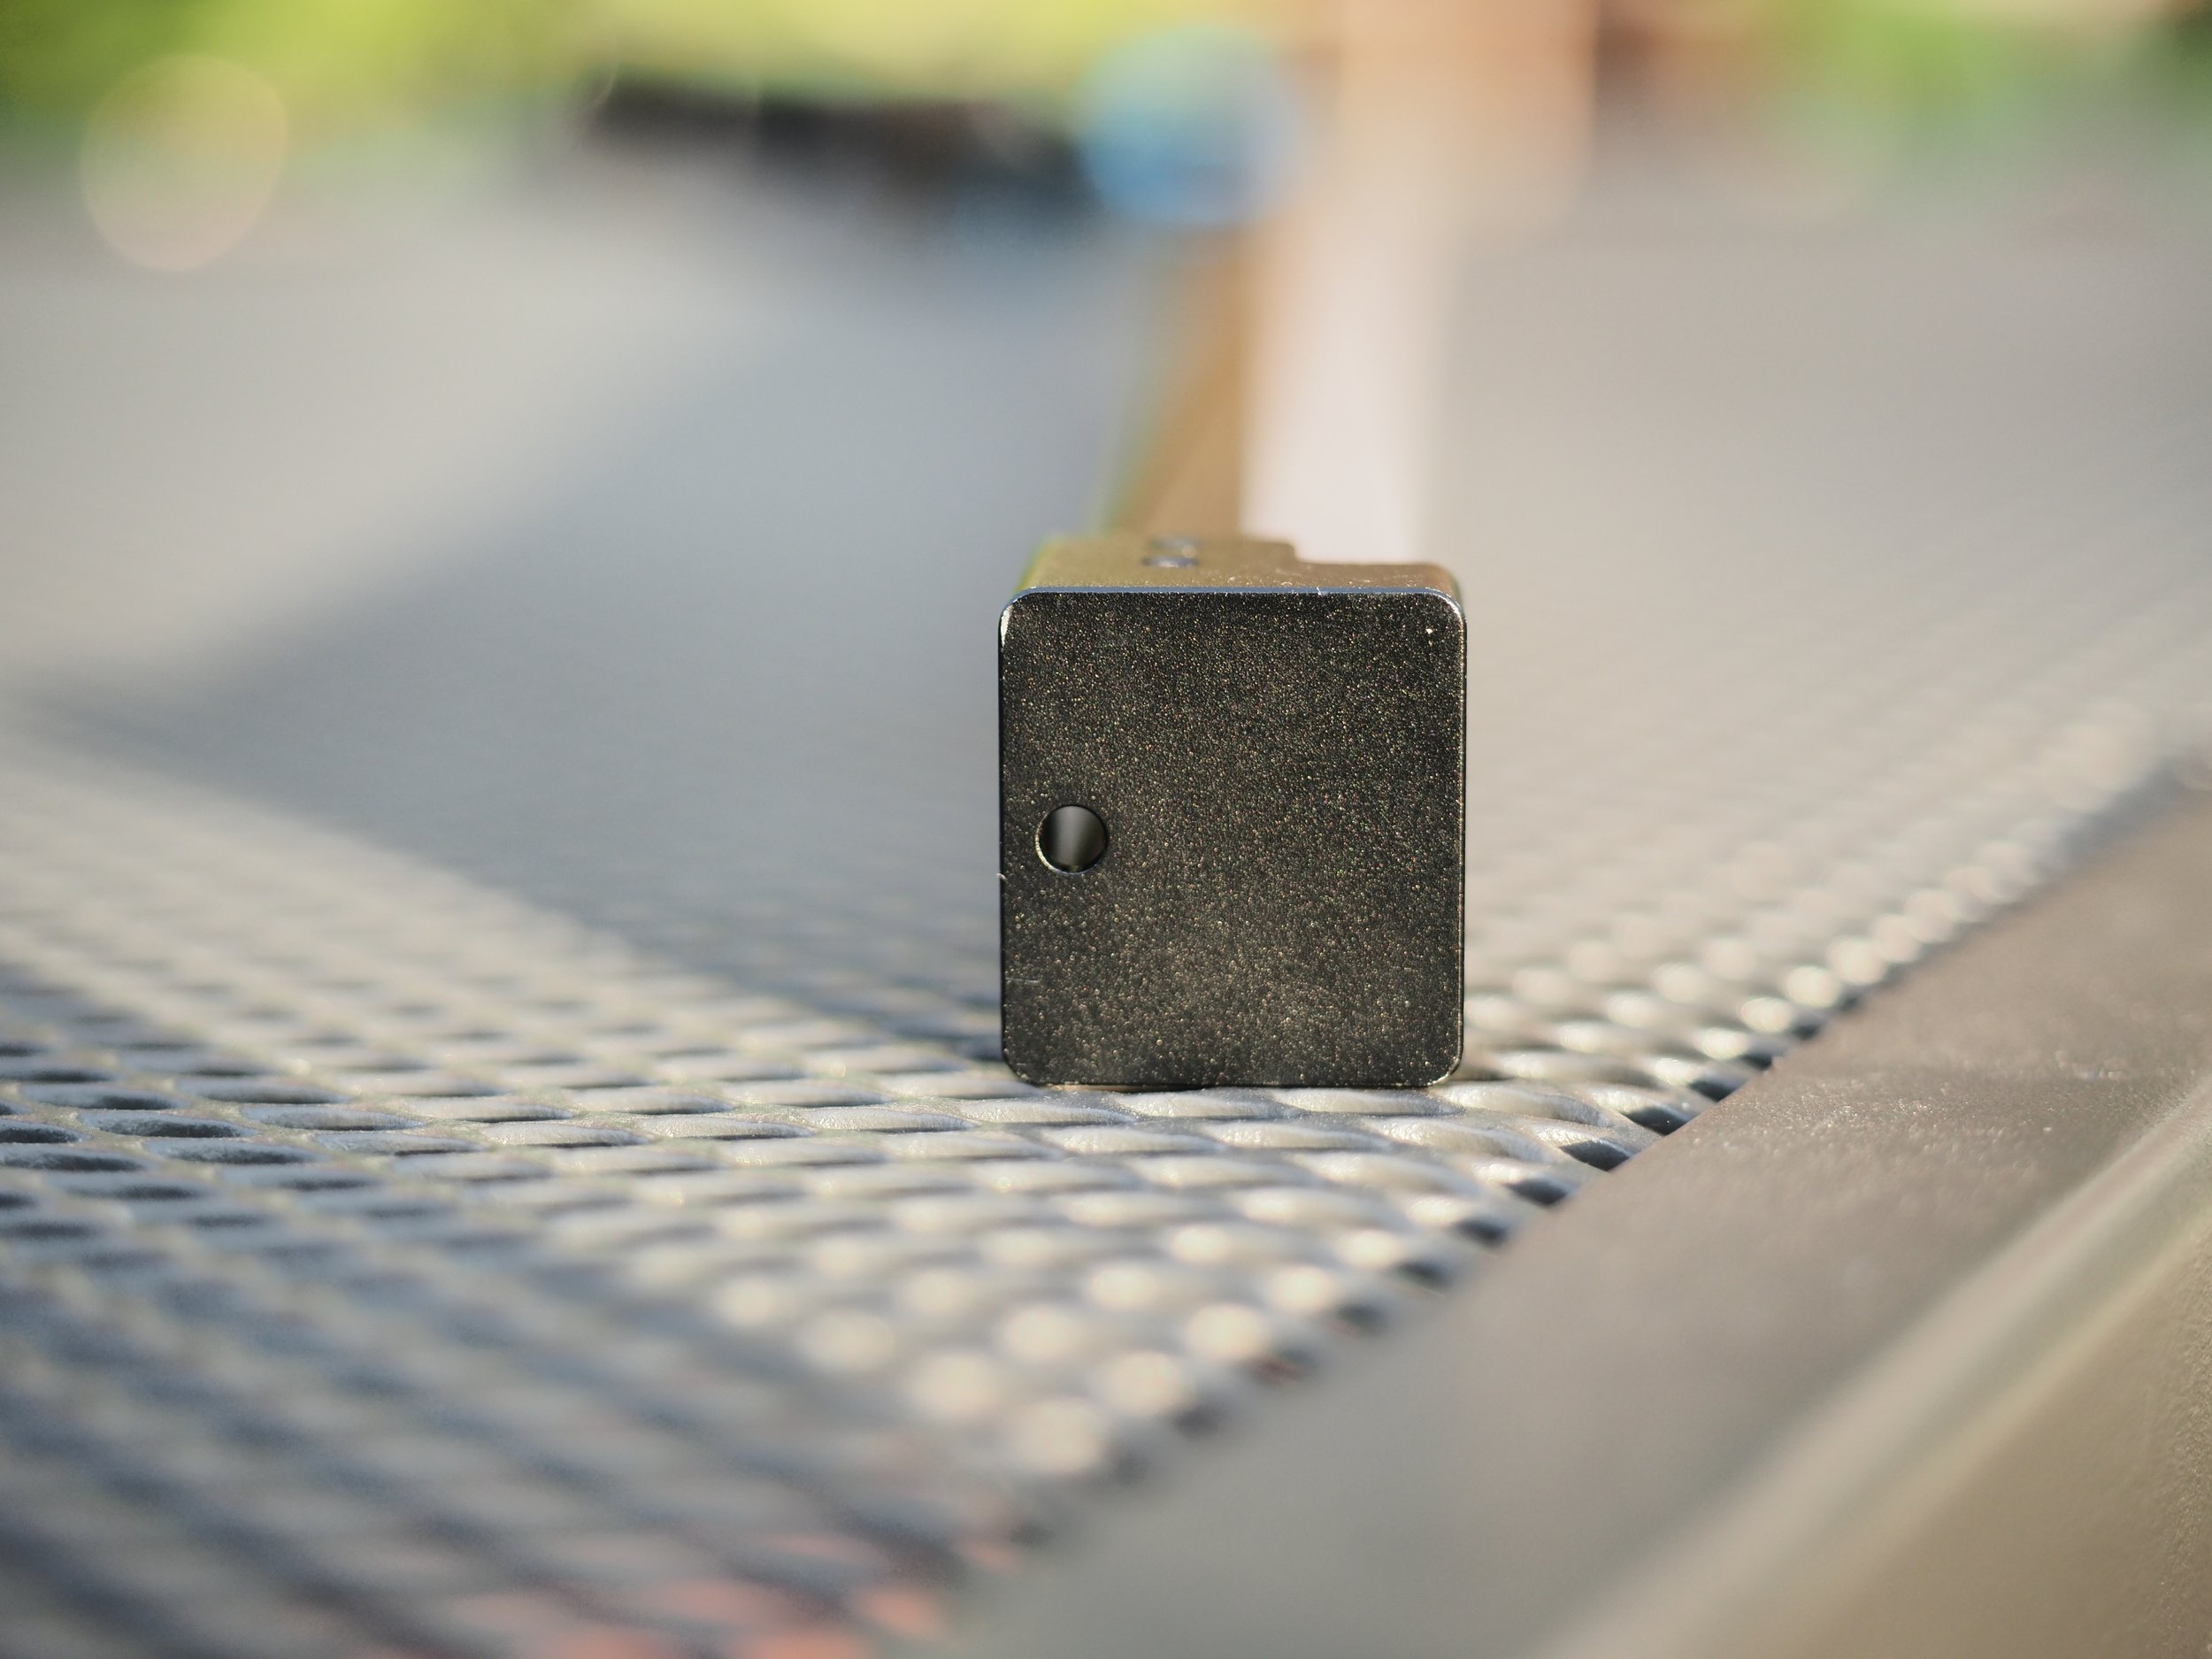
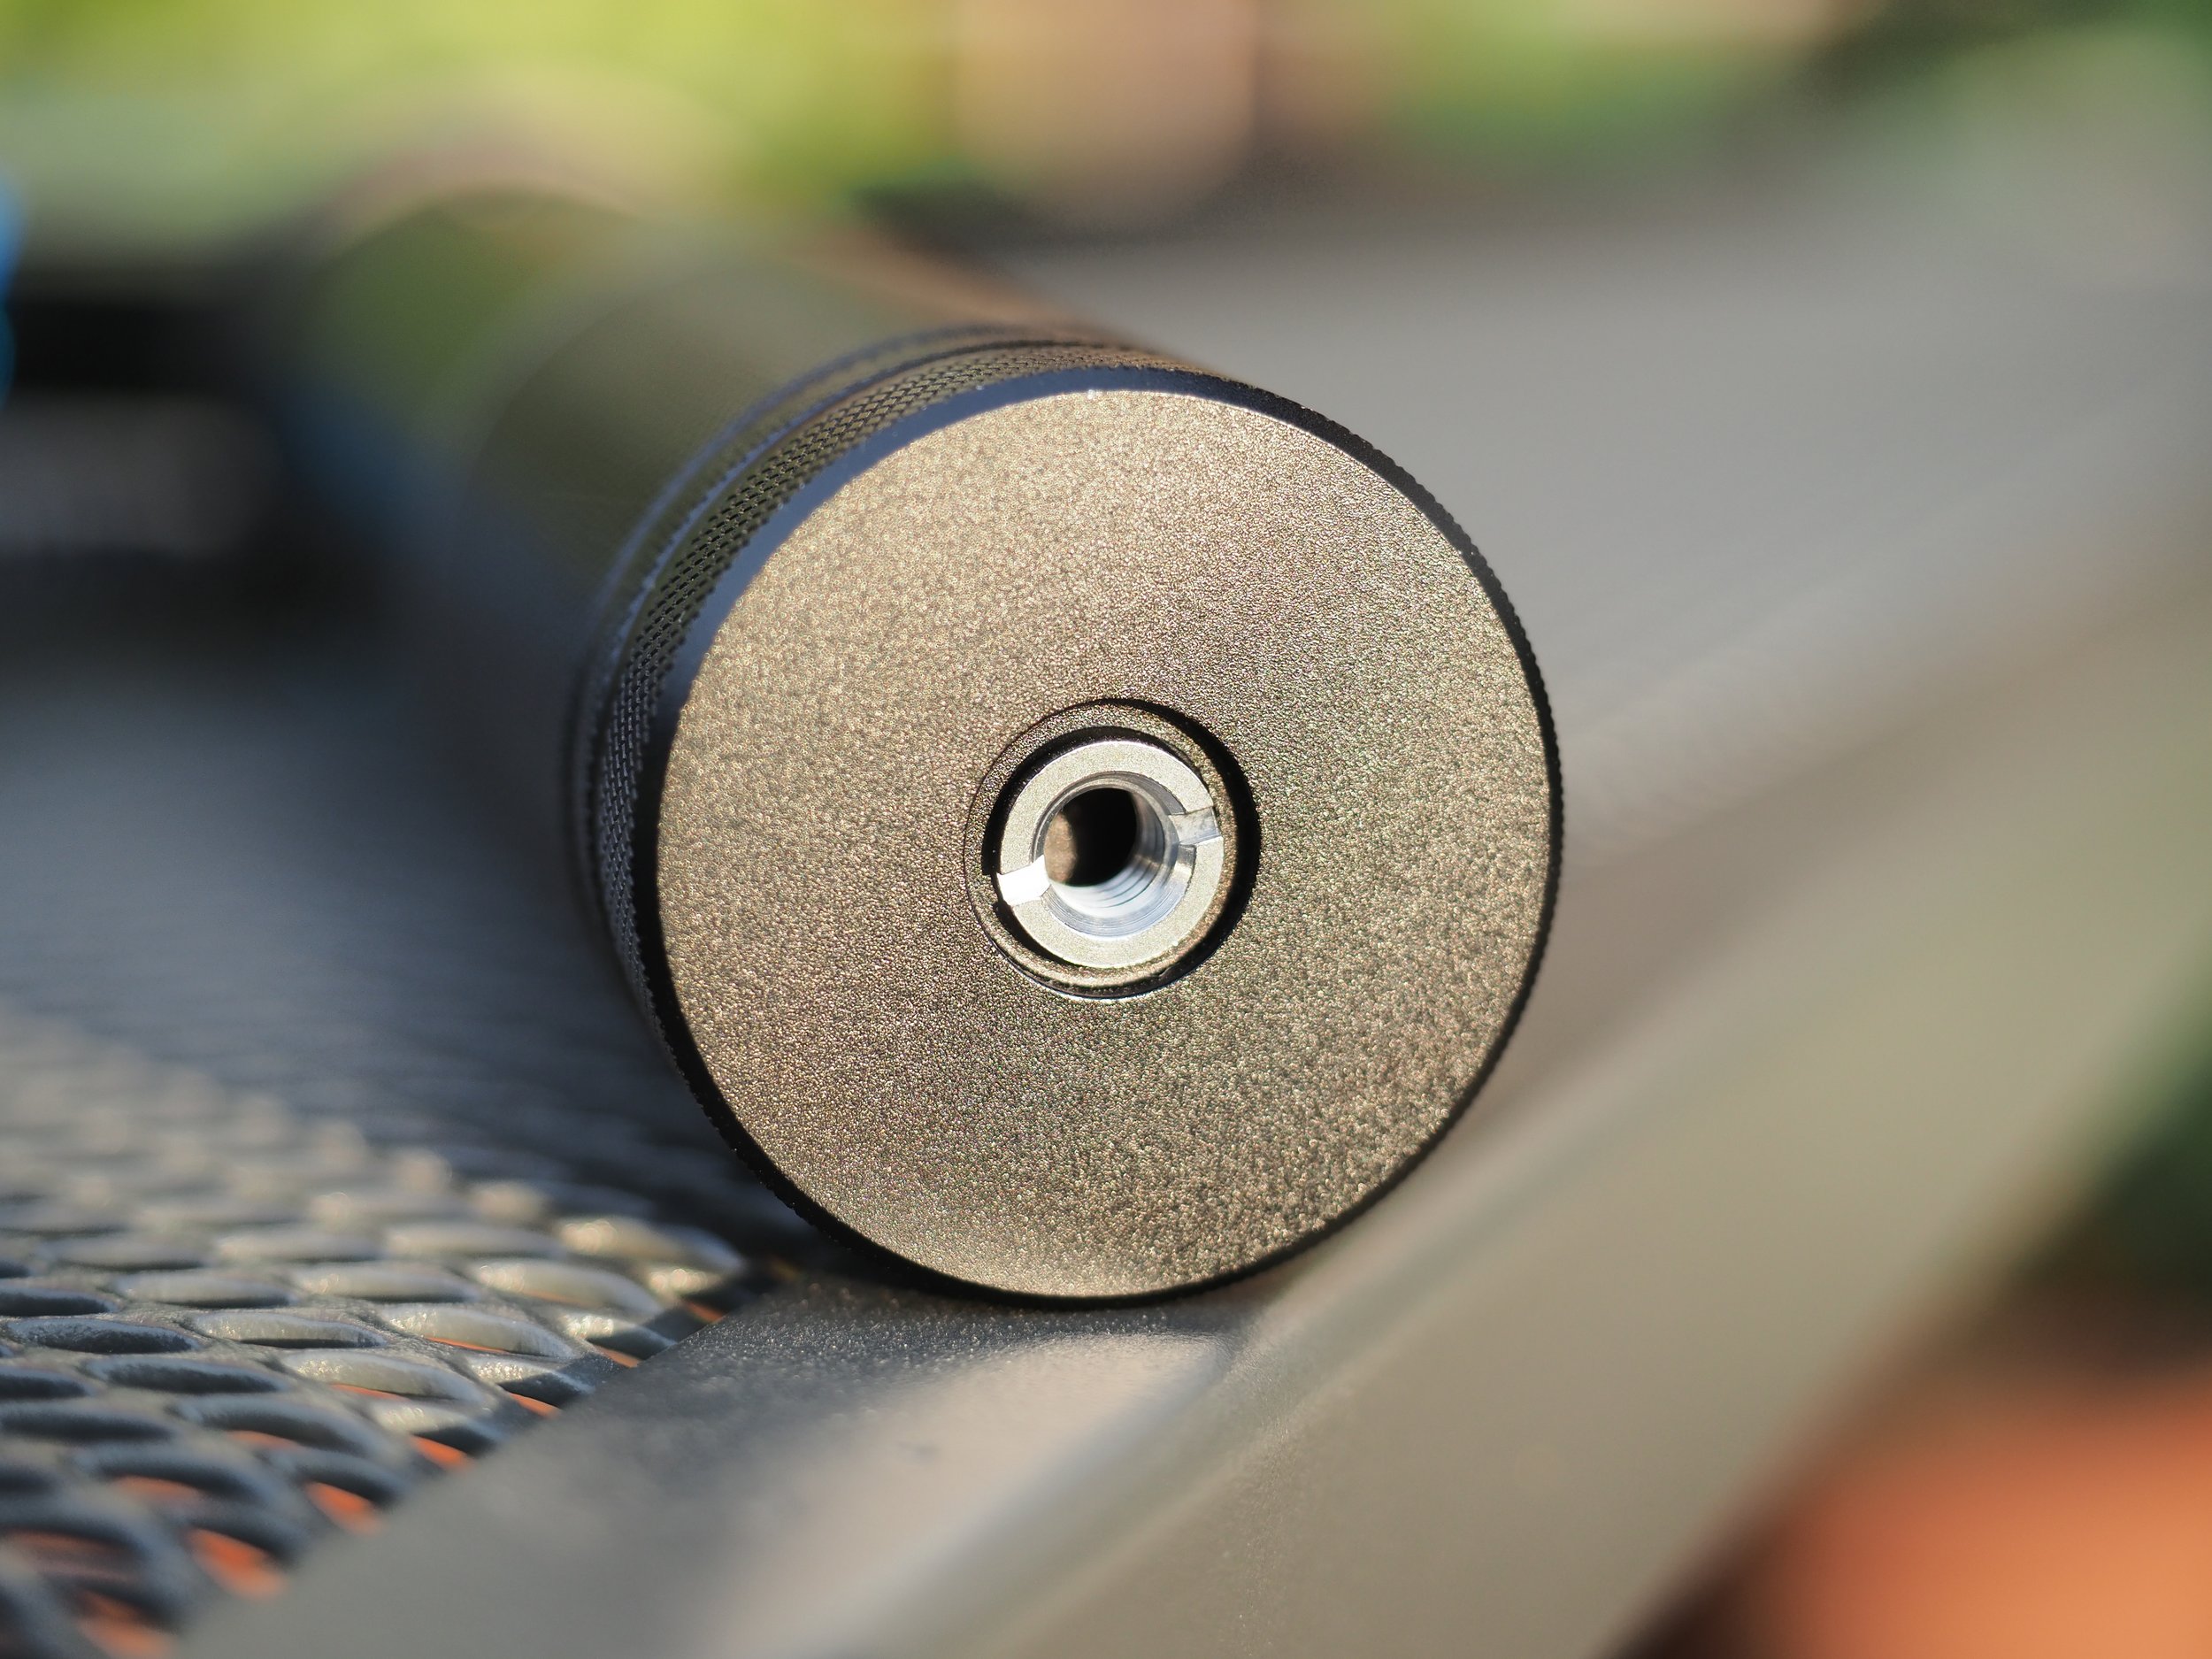
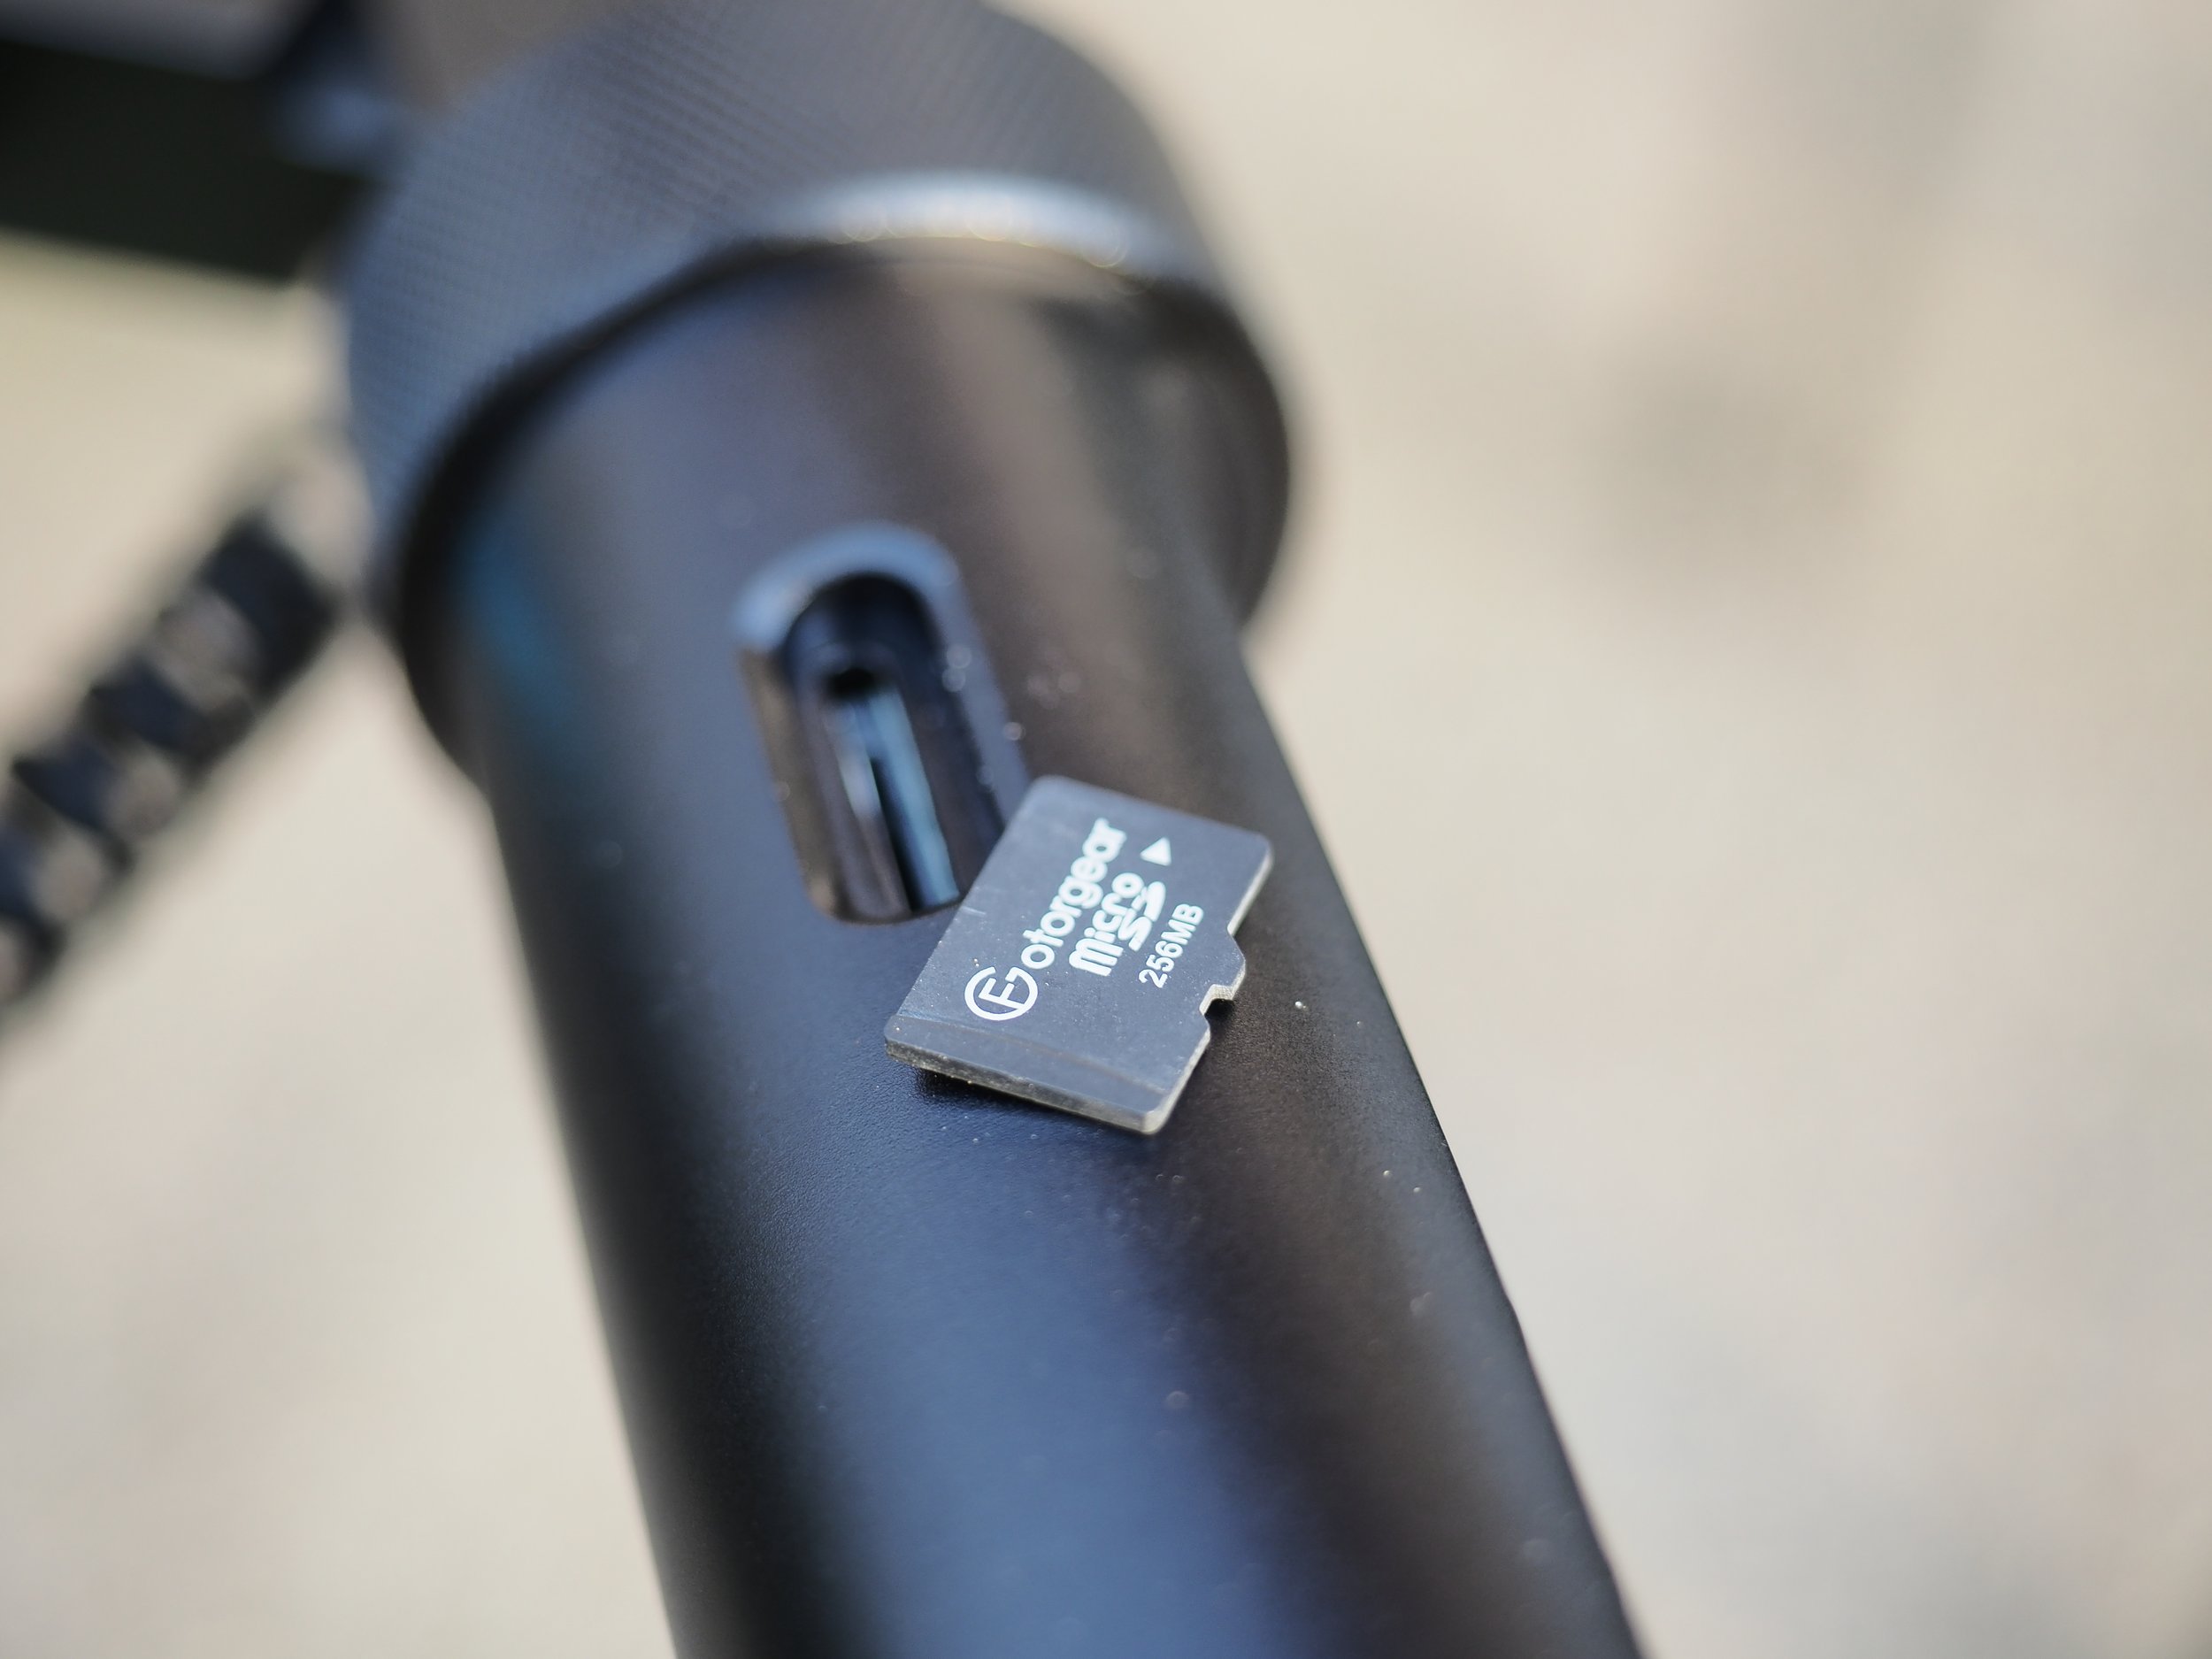
The Magilight consists of a one meter long prism, where 144 highly luminous LEDs are housed underneath the matte plastic. Attached to this prism on a sliding rail is an arm with complete electronics and controls. There is also a rotating ring on the arm, which makes it possible to create almost perfect light circles. The body is made of titanium alloys, everything fits tightly together, nothing squeaks or sticks anywhere. Magilight also meets IPX4 certification, meaning it can be used for short periods of time even in light rain. The LEDs can display up to 15 million colors at 800 lumens and should last up to 100,000 hours. It can run for up to 8 hours on battery power, the batteries are li-ion type 26350 with a capacity of 2000 mAh. There is a micro SD card slot on the side of the arm, which already stores various color themes and images in the base. However, this slot is not covered, so care must be taken to prevent water from getting in. There is a 3/8″ socket in the bottom for attaching to a tripod and it also includes a reduction screw to 1/4″ size. There is a small hole at the top for adding a sparkler which has a wonderful effect.
Controls and menus
Control is very simple via a basic cross of arrows, an OK and back button and a blue button to turn the device on and off. Once booted up, the logo lights up and after about 3 seconds you are taken to the menu which has three main categories. Choice of rooms, colour and settings.

Let's start with the simplest one, and that's the setup. Here are the classic options like turning the sound on and off - when it's on, Magilight beeps kind of annoyingly every time you press the button, so that was the first thing I turned off. There's also a setting for the remote launcher, which doesn't work in my case because it can't program support for Olympus, which is a shame. Hopefully they will release some sort of patch in the future that will fix this problem. Finally just the language settings, the ability to update the firmware and the FW version information.
The more interesting part is the color menu. Here we can choose from seven preset colors and then there is an RGB option - i.e. we can define absolutely any color, we just need to know the appropriate number combination. These combinations can be found on the internet, e.g. here. There is also a setting for luminance from one to one hundred percent, I usually set it to around 70%. Finally, there is also the option to set the blinking rate from one to ten times per second. So it is possible to combine constant illumination and then switch to a kind of strobe.
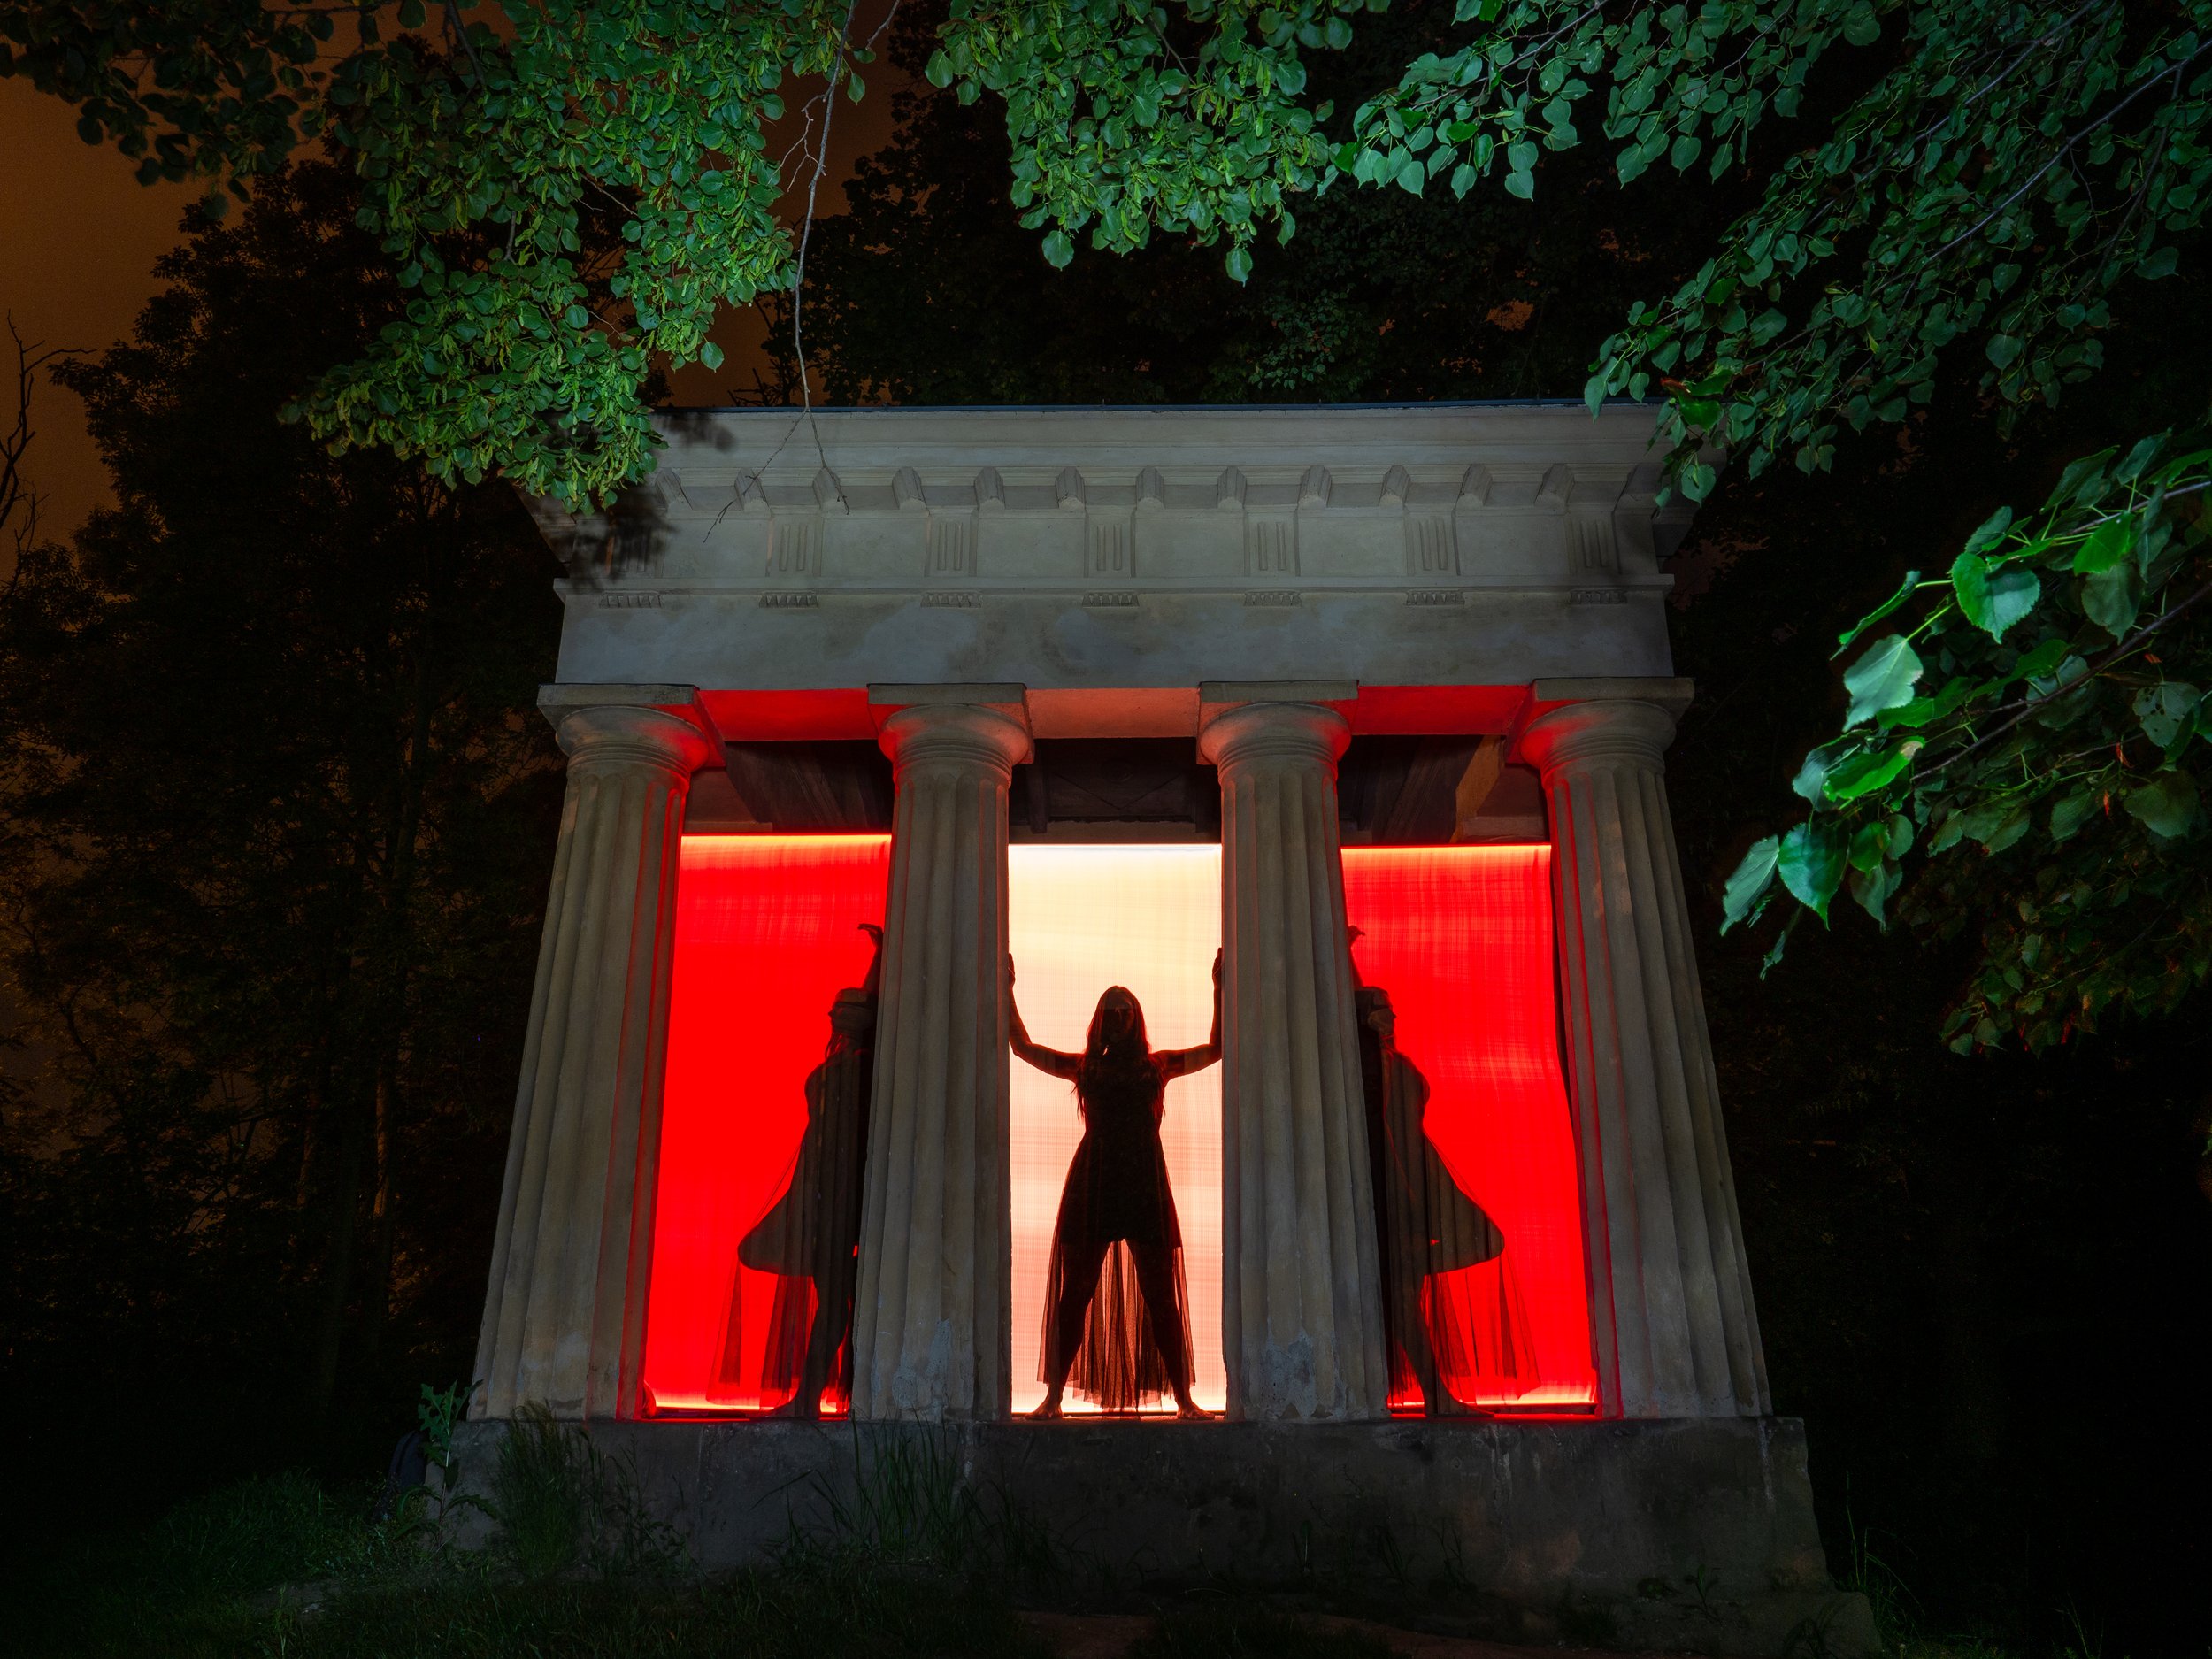
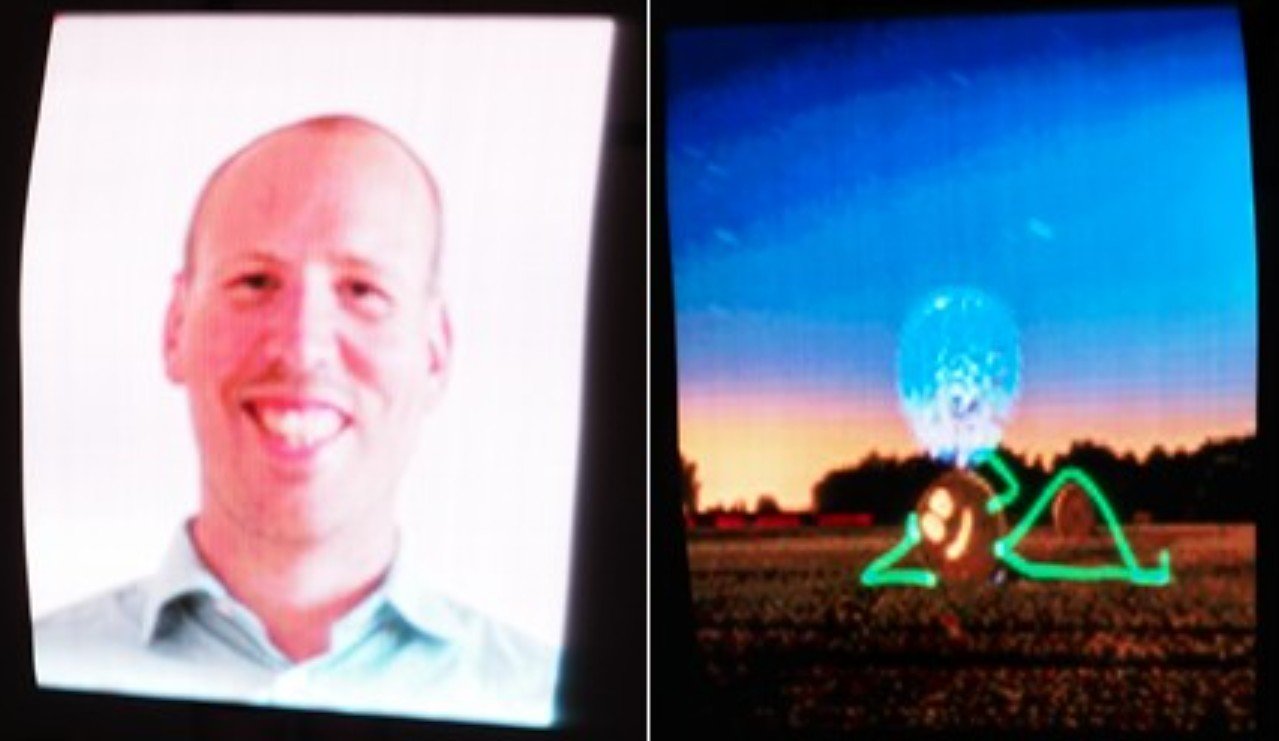
Probably the most interesting part is then the selection from the file. In the base, there are several files loaded on the micro SD card as for the mini bar, i.e. they have only 42 pixels, which contain both colours and various transitions and combinations of colours. The rest of the files are for the standard Magilight of 144 pixels and, apart from the colours and combinations themselves, contain other interesting options. For me personally, these are the wing and fire files. When used correctly, they produce a very hilarious effect. The remaining files then contain already completely finished images of fruits, video games or characters from them. But again the deeper settings are interesting. For each file you can set the time it takes for the motif to "print". For this kind of light drawing the term "lightprinting" is used, because the motif is no longer drawn, but "printed". There is also a useful countdown function for the time to power up, the maximum value is 10 seconds. This is followed by the option for auto repeat, setting the colour temperature, setting the strobe again and the direction of the images to be drawn - either right to left or vice versa. If you set the rendering one way and go the other, the resulting image will probably be upside down

Adding images/motifs
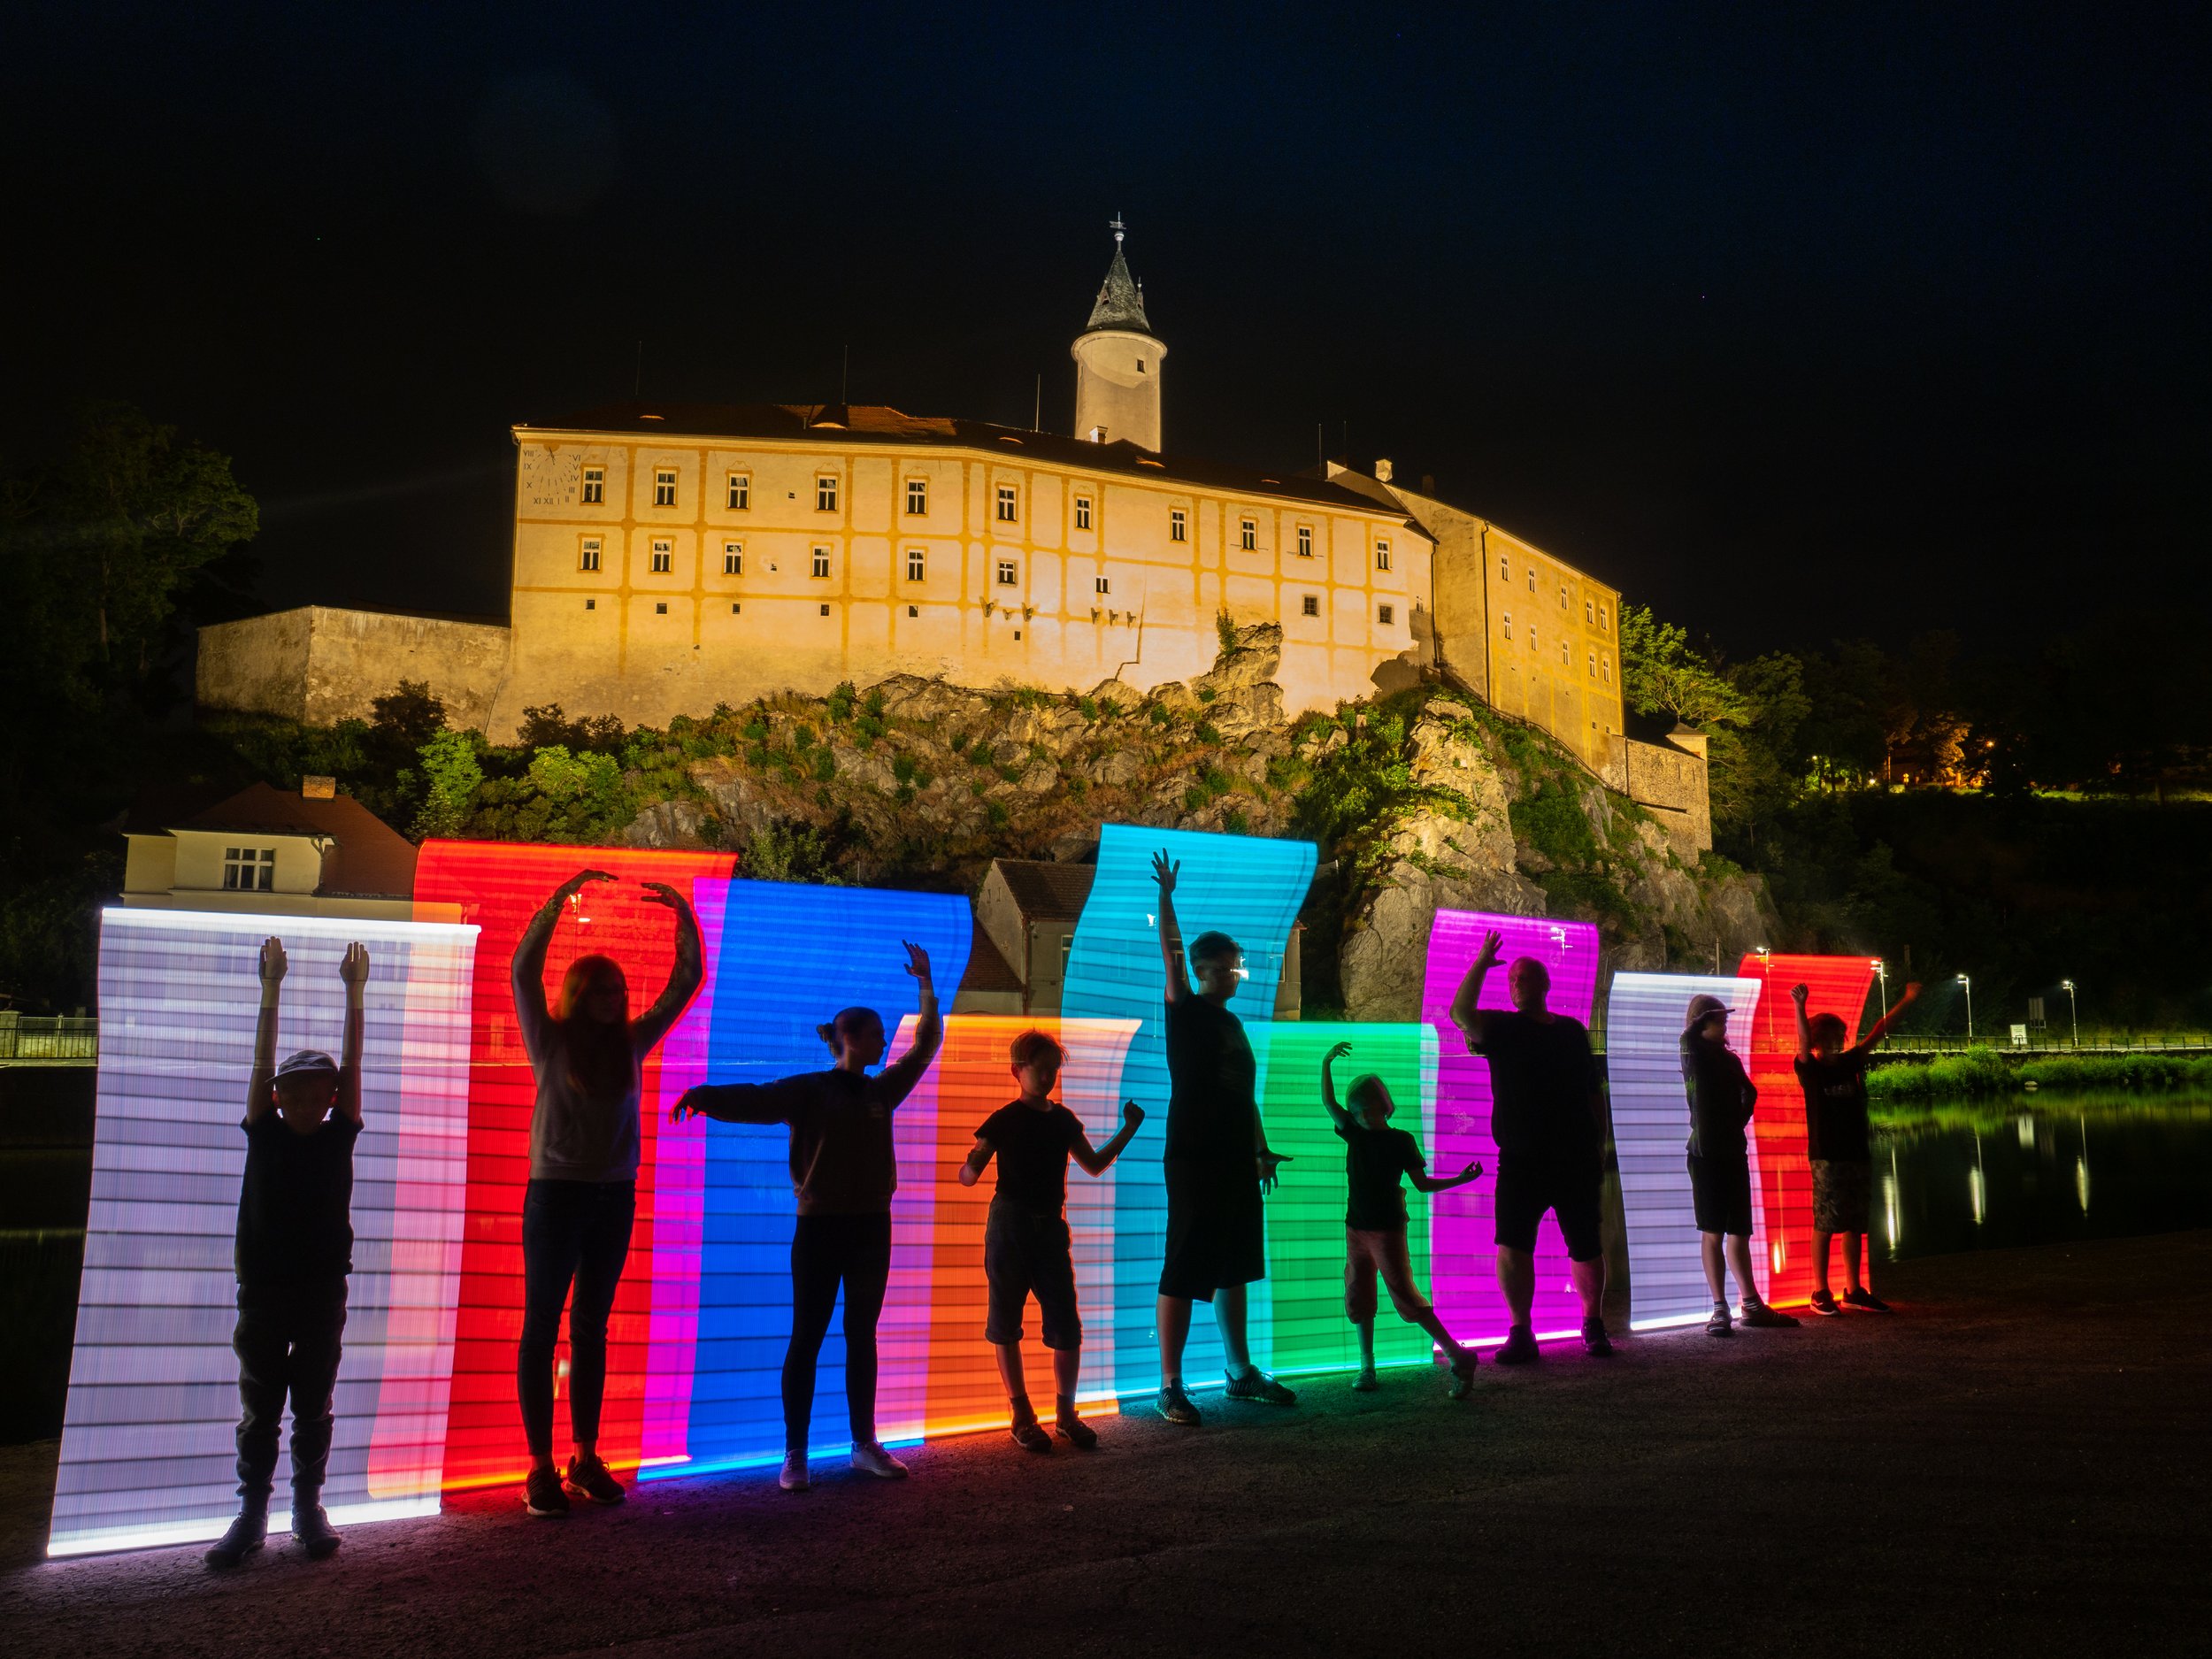
Adding is very simple. You have an image/photo/motif, paste it into a graphics editor, set the width to 144 pixels and save it in .bmp format. Then you just add it to the SD card in a folder and go shooting. It should be noted that the quality of these images is poor. It does something to the quality to edit a photo from 4533×3400 pixels to 192×144 pixels. But I don't suppose anyone uses original images this big. Anyway, it's perfectly usable for smaller images.
Using
Although the menu may seem large and cluttered, the opposite is true. Setting up the functions is really simple. The worst part is navigating through the files, of which there are about a hundred on the tab and it takes a while to find the one I need. I solved this by copying the contents to my phone and if I need to, I can look in the gallery and immediately know where to look in Magilight. The ability to position the arm 180° makes the hold comfortable in any situation.

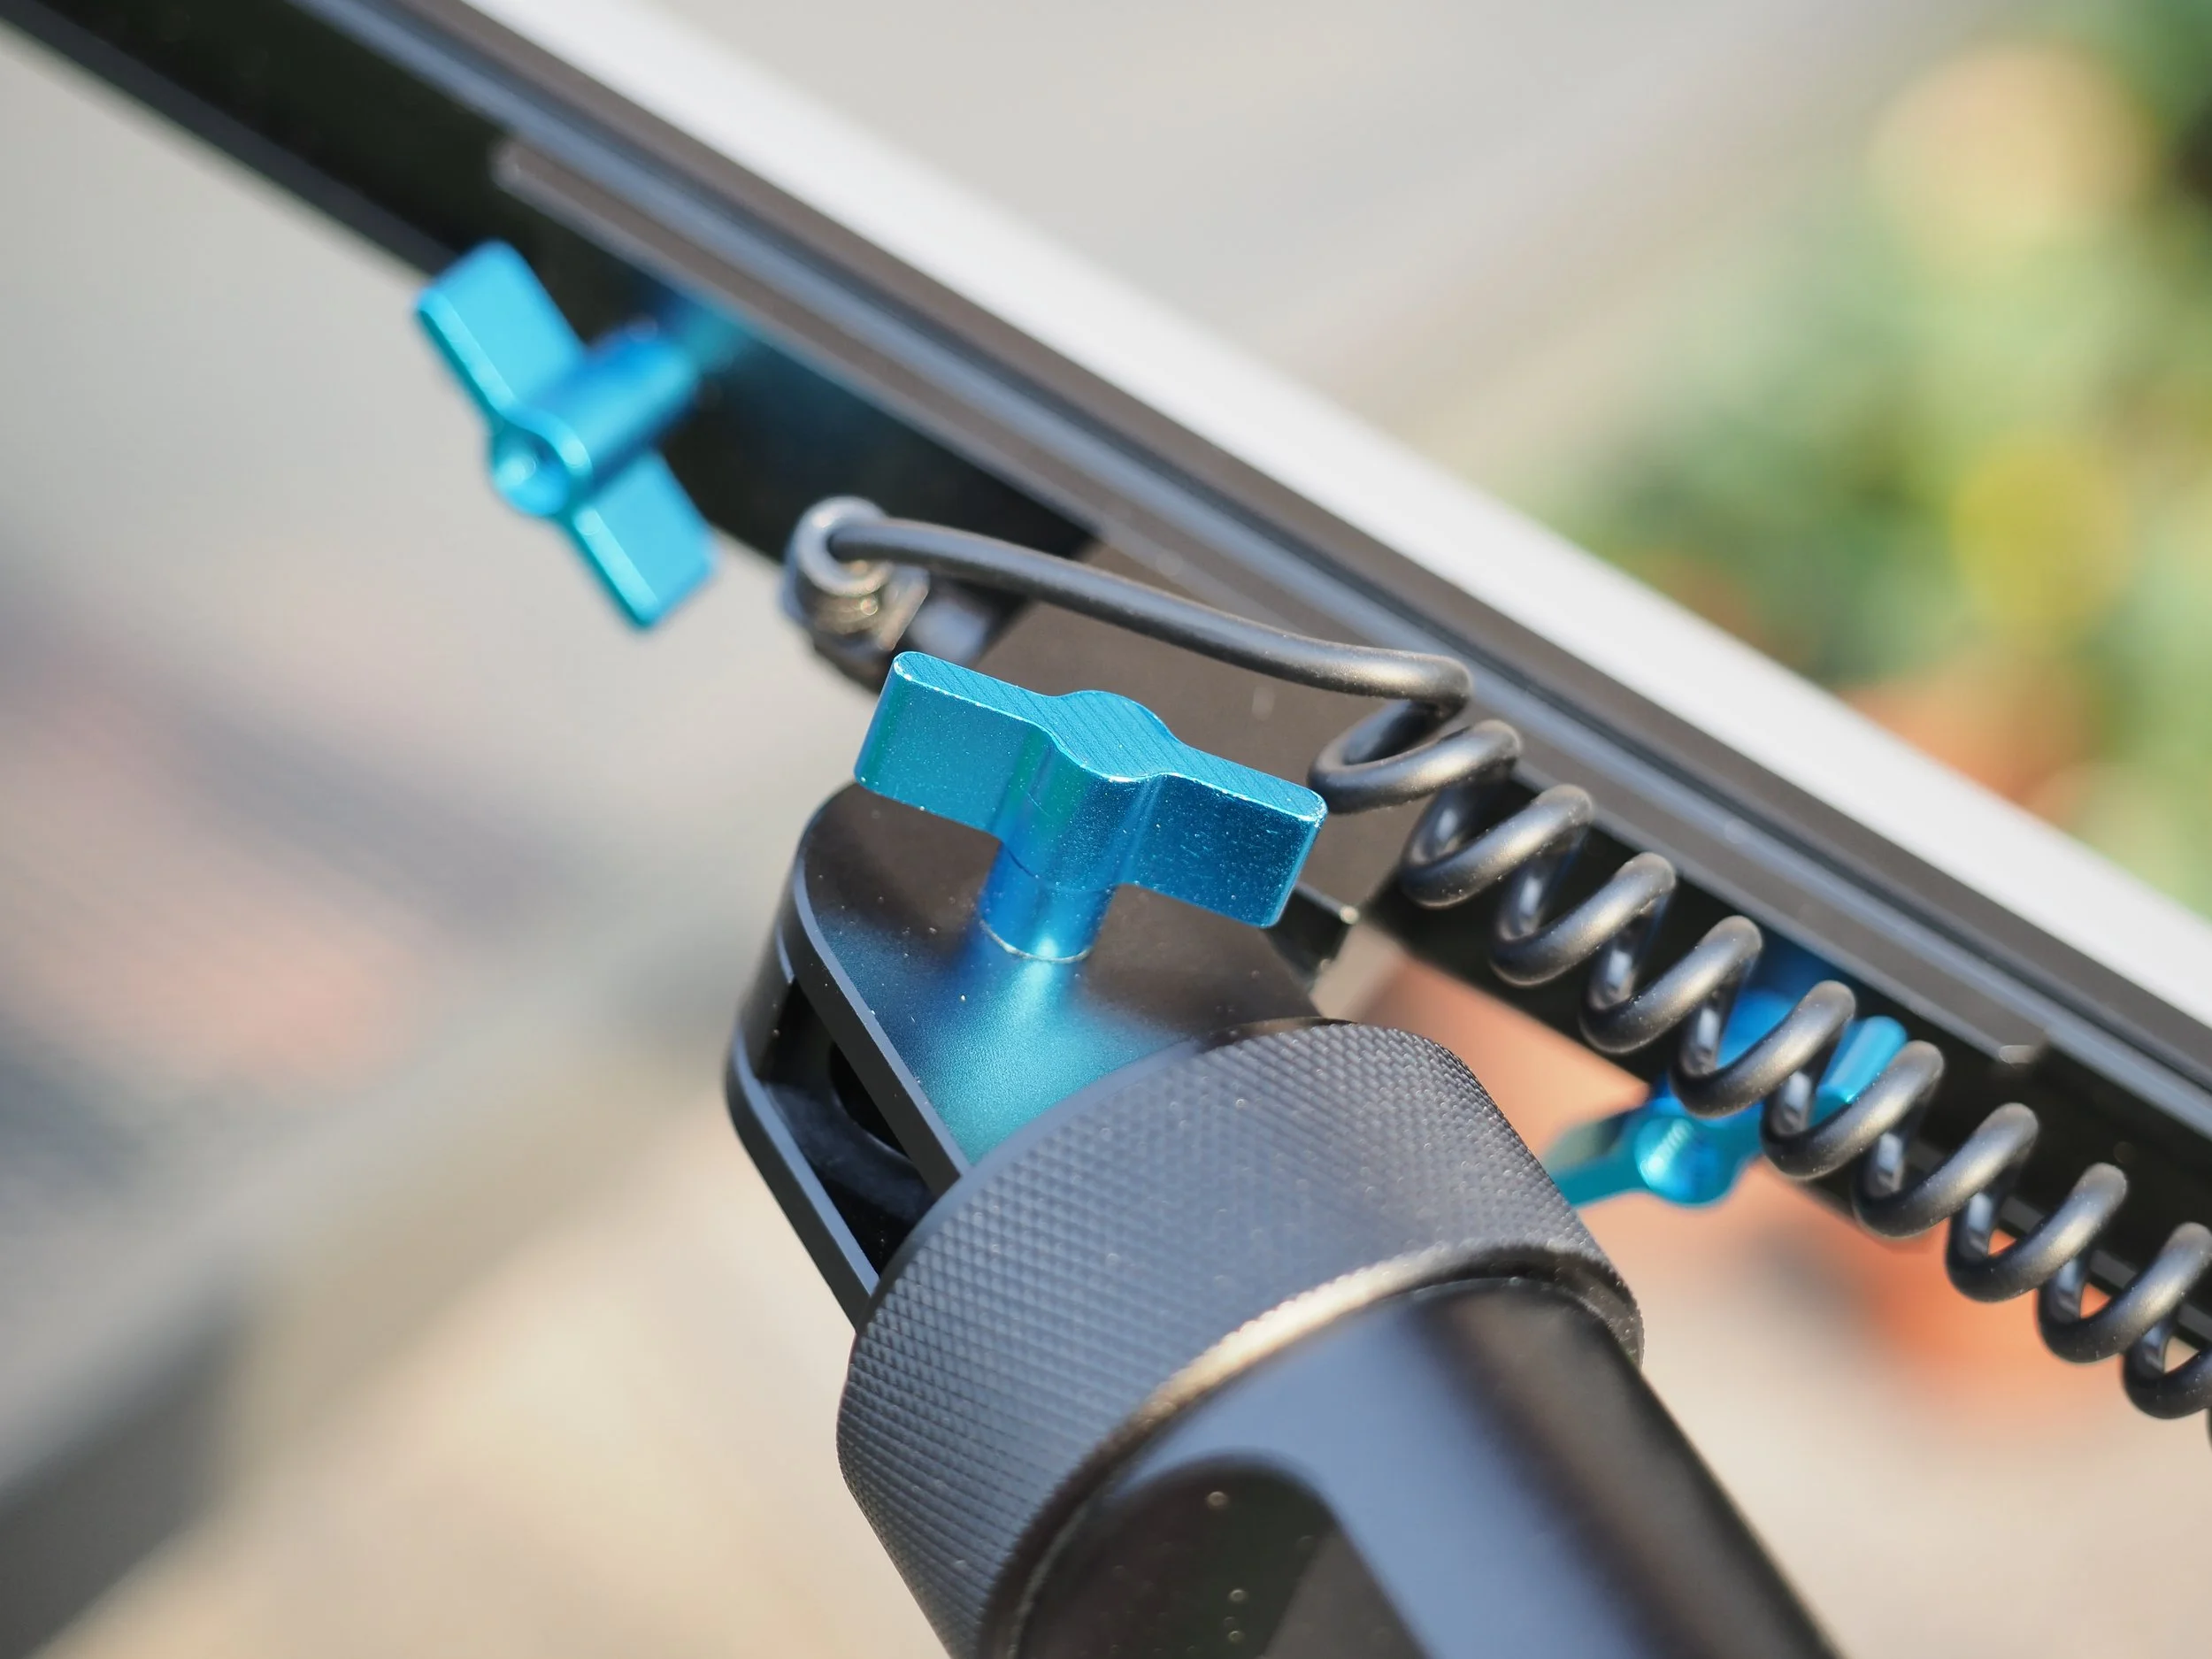
The ring that makes it possible to achieve the perfect circle
What could have been solved better
Unfortunately, here too there are a few little things that could have been solved a little better. Firstly, it's the micro SD card cover, which is completely open. Next, it would have liked a better quality cable connecting the arm and the LED strip. Unfortunately, it has no "memory" and if the arm is moved frequently, the cable is pulled out and it tends to shrink.
The power button is protruding, and unfortunately it sometimes gets pressed unintentionally when transported in a backpack and runs unnecessarily - there is also a lack of automatic shutdown or sleep option in the menu. I haven't noticed any other ailments so far.
Price
The Magilight can replace a plastic tube with colored filters and a handheld flashlight inside. However, I haven't mentioned the main thing yet and that is the price - currently (09/18) it costs just under $350, plus you need to add CLO. So, a simple calculation shows that the plastic tube comes out to a negligible packet compared to the Magilight and also serves the purpose. Fortunately I am buying the magilight during a crowdfund campaign for $200.
It can be purchased here
Overall, I would rate the device very positively. The controls are simple and intuitive, the workmanship is of high quality, and the device has a few minor ailments. Of course, the device can be used in situations other than drawing with light, such as studio light.